Payment Request
Payment Request Schedule
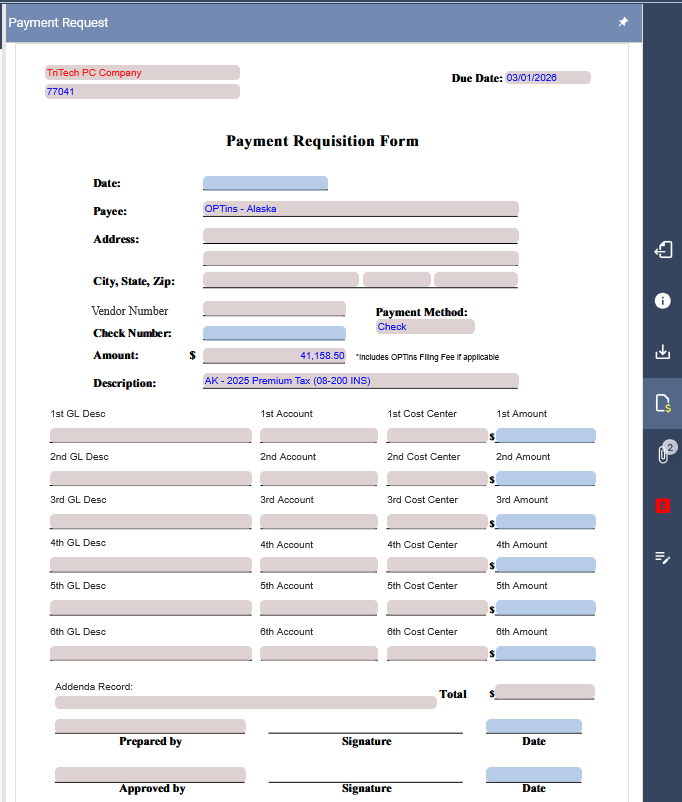
Stratus includes a Payment Request page for each applicable state return. The Payment Request can be accessed from the vertical icon bar on the right side of the screen.
The Payment Request form includes fields for payee information, as well as the ability to enter up to six G/L descriptions, account numbers, cost centers, and amounts. The description on the form will include the state abbreviation and tax year. The company NAIC number is displayed in the top left-hand corner, and a field is available for the addenda record.

Payment Request Schedule
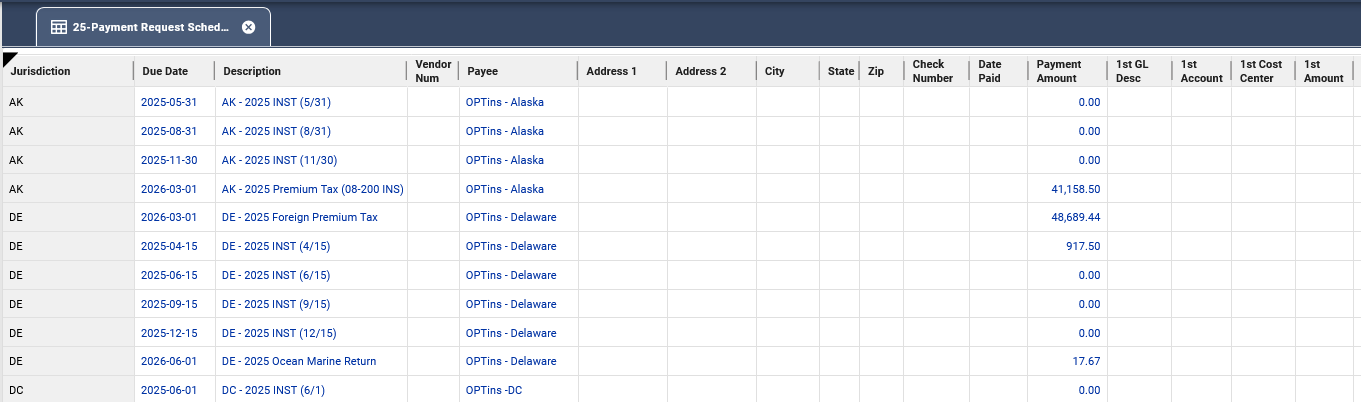
The Payment Request Schedule, located under Summary Schedules, provides a centralized view of all active payment requests in Stratus. This schedule allows you to review amounts due across returns.
You may also use copy and paste within this schedule to populate recurring values and reduce repetitive data entry.

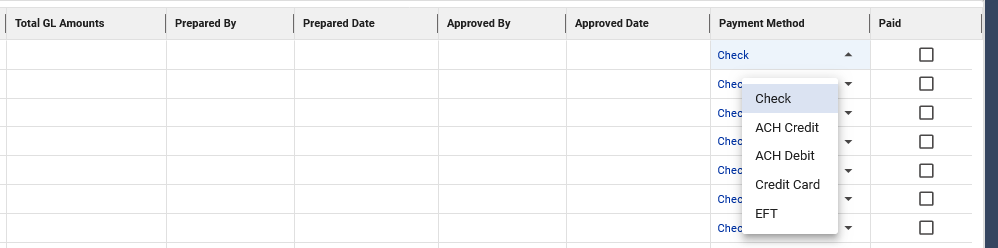
On the Payment Requisition Form within the schedule, a drop-down option is available to select the payment method, including:
- Check
- ACH Credit
- ACH Debit
- Credit Card
- EFT
Information entered on the Payment Request Schedule will populate the Payment Request form, and updates made on the form will also reflect back in the schedule.
Payment Request Export
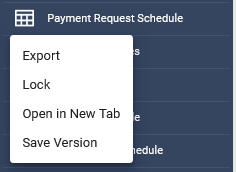
The Payment Request Export feature allows you to export data from the Payment Request Schedule into an ASCII file that can be imported into your accounts payable system.
Steps to Export Payment Requests
- Right-click on the Payment Request Schedule under Summary Schedules and select Export.
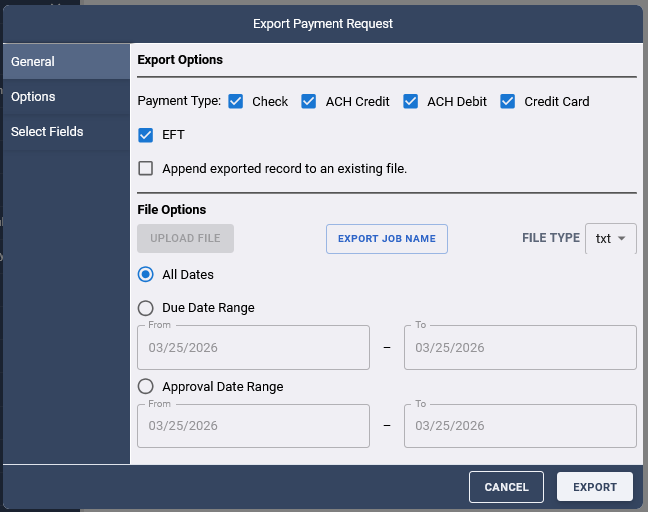
- In the General tab, select your export options:
- Choose the payment types to include (Check, ACH Credit, ACH Debit, Credit Card, EFT).
- Select whether to export by Due Date or Approval Date, and specify a date range if needed.
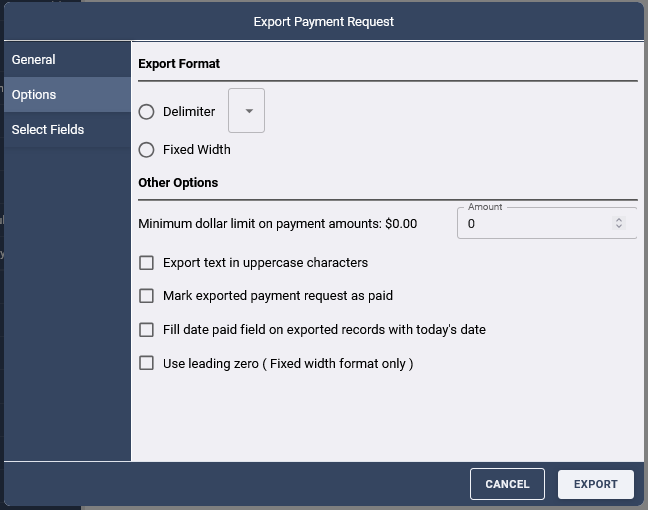
- In the Options tab, select your export format and preferences:
- Choose an export format: Fixed Width or Delimited.
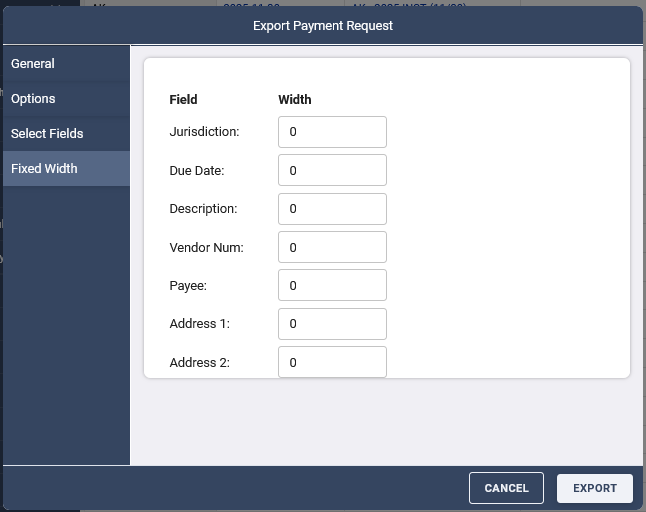
- If using Fixed Width, define field lengths on the Fixed Widths tab.
- If using Delimited, select the delimiter character.
- Select additional options such as exporting text in uppercase, marking records as paid, populating the date paid with the current date, exporting amounts as whole dollars, or including leading zeros (Fixed Width only).
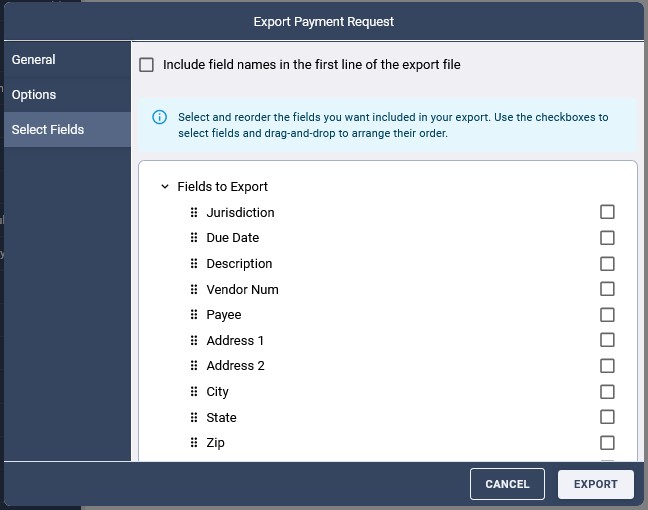
- In the Select Fields tab, choose the fields to include in the export.
- You may also select the option to include field names as a header row.
- You may also select the option to include field names as a header row.
- Click Export. The file will be downloaded.
- Review the exported file.